TYT TH-UV88 Hacks: Unlock Transmit Frequencies, Factory Tools and More
Disclaimer: The procedures described below allow you to modify the transmission range of your TYT TH-UV88, including unlocking frequencies that may be illegal for you to transmit on depending on your jurisdiction. Proceed at your own risk, and ensure that you’re compliant with local laws around transmission frequencies.
If you would like to skip the technical background and jump straight to instructions click here
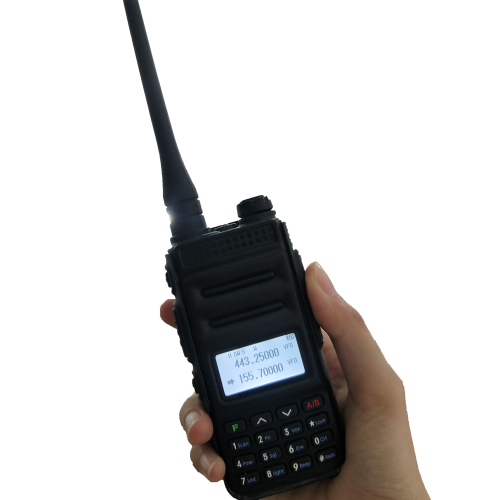
I recently picked up a TYT TH-UV88 hoping to have a cheap option for backroads use in Canada. As far as I know, this is the cheapest radio that has an ISED certification number for land mobile use, which is a special class of radios that operate outside of the designated amateur bands. These radios are commonly used for commercial traffic, and are especially handy on forestry roads so as not to get creamed by a logging truck.
When I picked out this radio I figured it would be a simple job to program the standard Resource Road channels, grab a license online from ISED and be on my way. I couldn’t understand why vendors were charging more than the value of the radio itself to program the channels.
The Problem
Turns out that when you buy a TH-UV88 in Canada, out of the box it’s locked to amateur frequencies. You can program the channels relatively easily, but when you try to transmit on them you’ll simply be kicked back to the last amateur frequency used. I contacted the vendor where I got my radio, and they informed me that unlocking the transmit ranges required software only supplied to dealers and I’d have to ship it back to them for programming.
I had a sneaking suspicion that the “dealer only” software required was probably the same as the consumer software with a few tweaks or extra menus. Given the quality of software often seen with these cheap handhelds the idea that they were actually shipping two separate software packages seemed far-fetched, so I started digging.
A Bit of Code Spelunking
The first step was looking into the setting.ini file that comes bundled with the software. As soon as I opened this up, my suspicions about the software being the same became a lot
stronger, as there were a couple settings that looked interesting:
[setup]
language=english
testmode=0
Factory=0
password=0
RadioName=UV-88
CompanyName=TYT INC.(C)
SoftVer=Ver1.0
CompleteTime=2016.08.05
COMSelect=COM5
Baudradio=115200
exepassword=777777
languagemenu=0
OwnUsed=5
voiceencrypt=1
timesetting=0
gpssystem=0
Chinese=Traditional
in particular, testmode, Factory and OwnUsed looked like they might be useful. With that out of the way, I stumbled onto another piece of good news when launching
the software from a non-default location; it crashed with an error message that let me know it was written with the .NET Framework, which is easy to decompile
and results in some very readable code. Jackpot!
Give Up Your Secrets!
I fired up DotPeek and got to work. There was a very helpfully named FatherWin.cs class that looked
like it contained the logic for the main application window, and was responsible for loading the configuration file we saw earlier. A lot of it is fairly inscrutable
this.toolStripMenuItem3.Name = "toolStripMenuItem3"; nonsense, but after a bit of reading I found this gem:
if (strArray[13].Substring(num13 + 1, strArray[13].Length - num13 - 1) == "ARRVIN")
{
    Class1.LanguageDisEable = "Enable";
    Class1.FactoryEn = true;
    Class1.GbTestModEn = true;
    Class1.GbOwnUsedEn = true;
}
I set OwnUsed=ARRVIN in the configuration file, figuring I was in business – but it was not to be. When you have the factory mode enabled, the app starts up with a
registration screen:
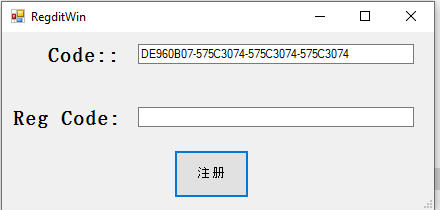
The code generated is based on the serial number of the first attached hard drive on your machine. My assumption is that dealers send this code to the factory, who can generate a matching one for the registration window. Here’s the function that does the key generation, where strTest is your hard drive serial:
public static string CodeAdj(string strTest, int Code)
{
    string strTest1 = "";
    for (int index = 0; index <= 3; ++index)
    {
    string str = RegditWin.StrAutoAdd0Pro(
        RegditWin.DataToHexStr(
            Convert.ToInt32(strTest.Substring(8 * index, 8), 16) ^ 1108691062),
            (byte) 8
    );
    strTest1 += str;
    }
    strTest = RegditWin.Chga_z_ToA_Z(strTest1);
    return strTest;
}
Luckily, I didn’t have to expend too much brain power in reverse engineering how this code generation works to make my own key as the developers left a handy backdoor:
if (str3 == text || text == "13636922224")
{
    int num = (int) MessageBox.Show("注册成功,谢谢使用!");
...
The text above translates to “Registration is successful, thank you for using!”. Done and dusted, and now we have factory tooling available for use!
Frequency Unlocking
As I mentioned above, my main goal was unlocking the radio to allow transmitting outside of the amateur 2m band (144-148MHz). Unfortunately, unlocking the factory mode on its own is not enough to do this. The frequency range menu is still read-only and won’t allow adjustment of the values. Back into the code we go.
I pulled up RfRangWin.cs which contains the code for the frequency limitation UI, and found a couple strings that suggested I was on the right path:
 public static string[,] Other_EngCh = new string[2, 2]
    {
      {
        "请输入密码:",
        "频段范围"
      },
      {
        "Enter Code:",
        "Frequency Range"
      }
    };
    private string[,] MessBoxName = new string[2, 2]
    {
      {
        "当前频率超出范围   [",
        "密码错误!请重新输入!"
      },
      {
        "Frequency Out Off Rang   [  ",
        "Code Error!Input Again!"
      }
    };
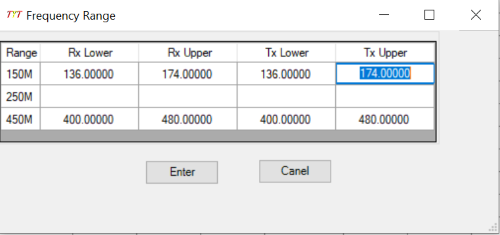
There was another gate here to prevent tweaking the VFO limiter without some kind of authorization. You can show the code entry box by pressing p
in the frequency range screen, as long as you have factory mode enabled:
private void RfRangWin_KeyPress(object sender, KeyPressEventArgs e)
    {
      if (e.KeyChar != 'p' || !Class1.FactoryEn)
        return;
      this.label1.Visible = true;
      this.textBox2.Visible = true;
      this.button1.Visible = true;
      Class1.EditEn = false;
      this.textBox2.Focus();
      this.KeyPreview = false;
    }
As before, the code we need to enter is hardcoded in the button press handler:
if (this.textBox2.Text == "FF88" || this.textBox2.Text == "13636922224")
{
this.label1.Visible = false;
this.textBox2.Visible = false;
this.button1.Visible = false;
Class1.EditEn = true;
this.button2.Visible = true;
this.button3.Visible = true;
}
With this done, we can finally change the frequency limitations:
Putting It All Together
To unlock the frequencies, factory tools, and test mode of your TYT TH-UV88:
- Find the install location for the software (by default this is
C:/UV88 V1.00) - In the subdirectory
Uv88_SoftWare_Engopen the includedsetting.inifile - Change the value of
OwnUsedtoARRVINand save it. You’ll need to launch the software as an administrator from now on. - Run TH-UV88.exe, you will get a popup asking for a reg code. Put in
13636922224.
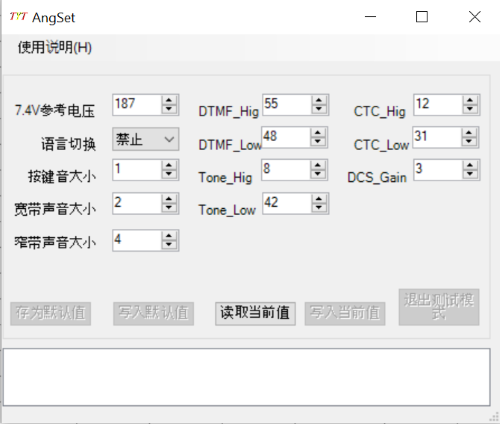
You now have access to the factory tuning tools and test mode. To unlock transmission frequencies:
- Open the frequency range menu from the left-hand side of the app
- Press
pto reveal another code box - Enter the code
13636922224again - Change the frequency values as needed and confirm
- Write changes to your radio
What’s Next?
I haven’t played much with the factory tooling that’s unlocked. Some of it looks like it has a high potential for breaking things, and what I was really after
(locking the front panel of the radio) doesn’t appear to be in there. But, some options for those of you who are more adventurous than me:
I’m also still searching for a way to lock the handset out of VFO mode and allow only selecting from the loaded channels. This is required under section 3.2 of RSS-119 for Land Mobile use in Canada:
Transmitters With External Frequency Selection Controls
In order to prevent radio interference caused by end-user transmissions on unauthorized frequencies, transmitters with external frequency selection controls and/or frequency programming capability shall conform to the following:
- Transmitters with external frequency selection controls shall operate only on authorized channels which have been preset by the manufacturer, equipment supplier, service technician or maintenance personnel.
- Transmitters with frequency programming capability must have at least one of the following design characteristics, which prevent the user from altering the preset frequencies:
- Transmitters with external controls available to the user can only be internally modified to place the equipment in the programmable mode. Furthermore, while in the programmable mode, the equipment is not capable of transmitting. The procedure for making the modification and altering the frequency program is not available to the user of the equipment.
- Transmitters are programmed for frequencies through controls that are inaccessible to the user.
- Transmitters are programmed for frequencies through the use of external devices or specifically programmed modules that are available only to the service technician or maintenance personnel.
- Transmitters are programmed through cloning (i.e., copying a program directly from another transmitter) using devices and procedures that are available only to the service technician or maintenance personnel.
It’s possible to do this, and the same model purchased in the U.S. has the panel locked out of the box. I have yet to find the relevant config in the software and it may be a true
factory-only option. At your own risk, you may be able to just leave the radio in channelled mode and hope that anyone checking doesn’t know how to toggle back to VFO mode
which is done by pressing the # key.